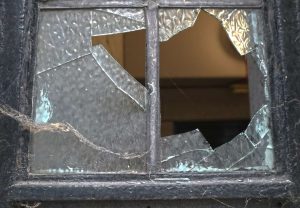
At a glance
A cracked driveway is one of the most common exterior repair jobs for UK homeowners. The freeze-thaw cycles of a British winter are particularly hard on driveway surfaces – water gets into small imperfections, freezes and expands, and turns hairline cracks into wider ones over successive cold spells. Left unrepaired, small cracks become larger ones, and larger ones become trip hazards or structural problems that cost considerably more to sort out.
The good news is that most driveway cracks are straightforward DIY repairs. The approach depends on the surface type – concrete, tarmac and block paving all need different products and techniques – but none require specialist skills or expensive equipment. The key is addressing cracks while they are still manageable rather than waiting until the damage spreads.
Assessing the damage
Before buying any products, spend a few minutes assessing what you are actually dealing with. The size, depth and pattern of the cracks will determine both the right repair method and whether the job is DIY-suitable or needs a professional.
If cracks are accompanied by sunken or raised sections of driveway, stop and investigate before repairing. Surface cracks over a failing base will reappear within months regardless of how well they are filled. The underlying cause – usually poor drainage, tree root movement or a failing sub-base – needs addressing first.
Crack types and the right fix
The surface material determines the products and method. Using the wrong filler on the wrong surface is one of the most common reasons DIY driveway repairs fail – tarmac repair compound applied to concrete will not bond properly, and concrete mortar applied to tarmac will crack and pop out within a season.
Fixing cracks in concrete driveways
Concrete is the most common driveway surface in UK new-builds and the most straightforward to repair. The process is the same whether you are using a liquid filler for hairline cracks or a ready-mix repair mortar for wider ones – the critical step is preparation. A filler applied to a dirty or dusty crack will not bond and will fail within a season.
- Step 1 – Clean the crack thoroughly. Use a stiff wire brush to remove all loose material, moss, weeds and debris from inside the crack. A pressure washer is ideal for this – get into the crack as much as possible and allow the surface to dry completely before applying any filler.
- Step 2 – Undercut wider cracks. For cracks wider than around 5mm, use a cold chisel and hammer or an angle grinder with a diamond blade to widen the crack slightly into a V-shape or undercut the edges. This gives the filler more surface area to bond to and prevents it popping out.
- Step 3 – Apply a bonding agent. For repair mortars on wider cracks, brush PVA adhesive diluted 1:1 with water into the crack before filling. This dramatically improves adhesion between the old concrete and the new repair material.
- Step 4 – Fill and finish. For hairline cracks use a liquid polyurethane filler applied with a brush or poured directly into the crack. For wider cracks, pack repair mortar firmly into the crack in layers, tamping each layer down before adding the next. Finish flush with the surrounding surface using a trowel or float.
- Step 5 – Seal the repair. Once fully cured (allow at least 24-48 hours), apply a concrete sealant over the repaired area and ideally the whole driveway. This protects the repair and slows future water ingress.
Do not repair concrete in freezing temperatures or when rain is forecast. Most concrete fillers and repair mortars need a minimum of around 5-10 degrees Celsius to cure properly. Applying filler to a cold surface or one that gets rained on before it cures will result in a failed repair. Spring and early autumn are ideal for driveway repairs in the UK.
Fixing cracks in tarmac driveways
Tarmac cracks respond best to bitumen-based products specifically designed for the material. The flexibility of tarmac means it expands and contracts with temperature changes, so a rigid repair like concrete mortar will crack and work loose quickly. Cold-lay tarmac repair compound and bitumen crack fillers are designed to move with the surface.
- Step 1 – Clear the crack. Remove all loose material, weeds and debris. A heat gun applied briefly to the crack edges softens the surrounding tarmac and helps the repair material bond more effectively.
- Step 2 – Fill with cold-lay compound. For wider cracks and potholes, overfill slightly with cold-lay tarmac compound – it compacts down. Tamp firmly with a tamper or the end of a length of timber, then compact further by placing a board over the repair and driving over it slowly.
- Step 3 – Seal hairline cracks. For fine cracks, a bitumen-based liquid crack filler applied with a brush or poured from a bottle seals the surface effectively. Work it into the crack and smooth with a trowel.
- Step 4 – Apply tarmac sealant. Once repairs are complete, a tarmac restorer and sealant applied to the whole driveway unifies the appearance and protects against further water ingress and UV damage.
Fixing cracks in block paving
Block paving rarely cracks in the same way as concrete or tarmac – individual blocks may crack or break, but more commonly the joints between blocks open up, allowing blocks to shift and creating uneven surfaces. The fix depends on which problem you are dealing with.
For cracked or broken individual blocks, the repair is straightforward – lift the damaged block using a bolster chisel, remove it, relay on a fresh bed of sharp sand and tamp level. Replacement blocks are widely available from builders merchants, though matching the colour of weathered existing blocks can be a challenge. For joint problems, sweep kiln-dried jointing sand across the whole area, working it into the joints with a stiff brush, then compact with a plate compactor or by rolling a heavy garden roller across the surface.
Preventing cracks coming back
The UK climate makes some driveway cracking almost inevitable over time, but a few straightforward steps significantly extend the life of any repair and slow the formation of new cracks.
Sealing the driveway every two to three years is the single most effective preventative measure – it stops water penetrating the surface and eliminates the freeze-thaw cycle that causes most cracking. Keep drains and gullies clear so water does not pond on the surface. Avoid parking very heavy vehicles – large vans or lorries – repeatedly in the same spot, as this causes localised base compression over time. Deal with any weeds growing through cracks promptly – their roots widen cracks significantly as they grow, and stopping weeds growing through hard surfaces is much easier when addressed early.
For significant areas of cracking that keep returning despite repairs, the underlying cause is almost always drainage-related. A blocked or broken drain beneath or adjacent to the driveway allows water to saturate the sub-base, which then shifts and settles unevenly. Sorting the drainage properly – even if it means lifting a section of driveway – will cost less in the long run than repeated surface repairs over a failing base.
Share on socials: